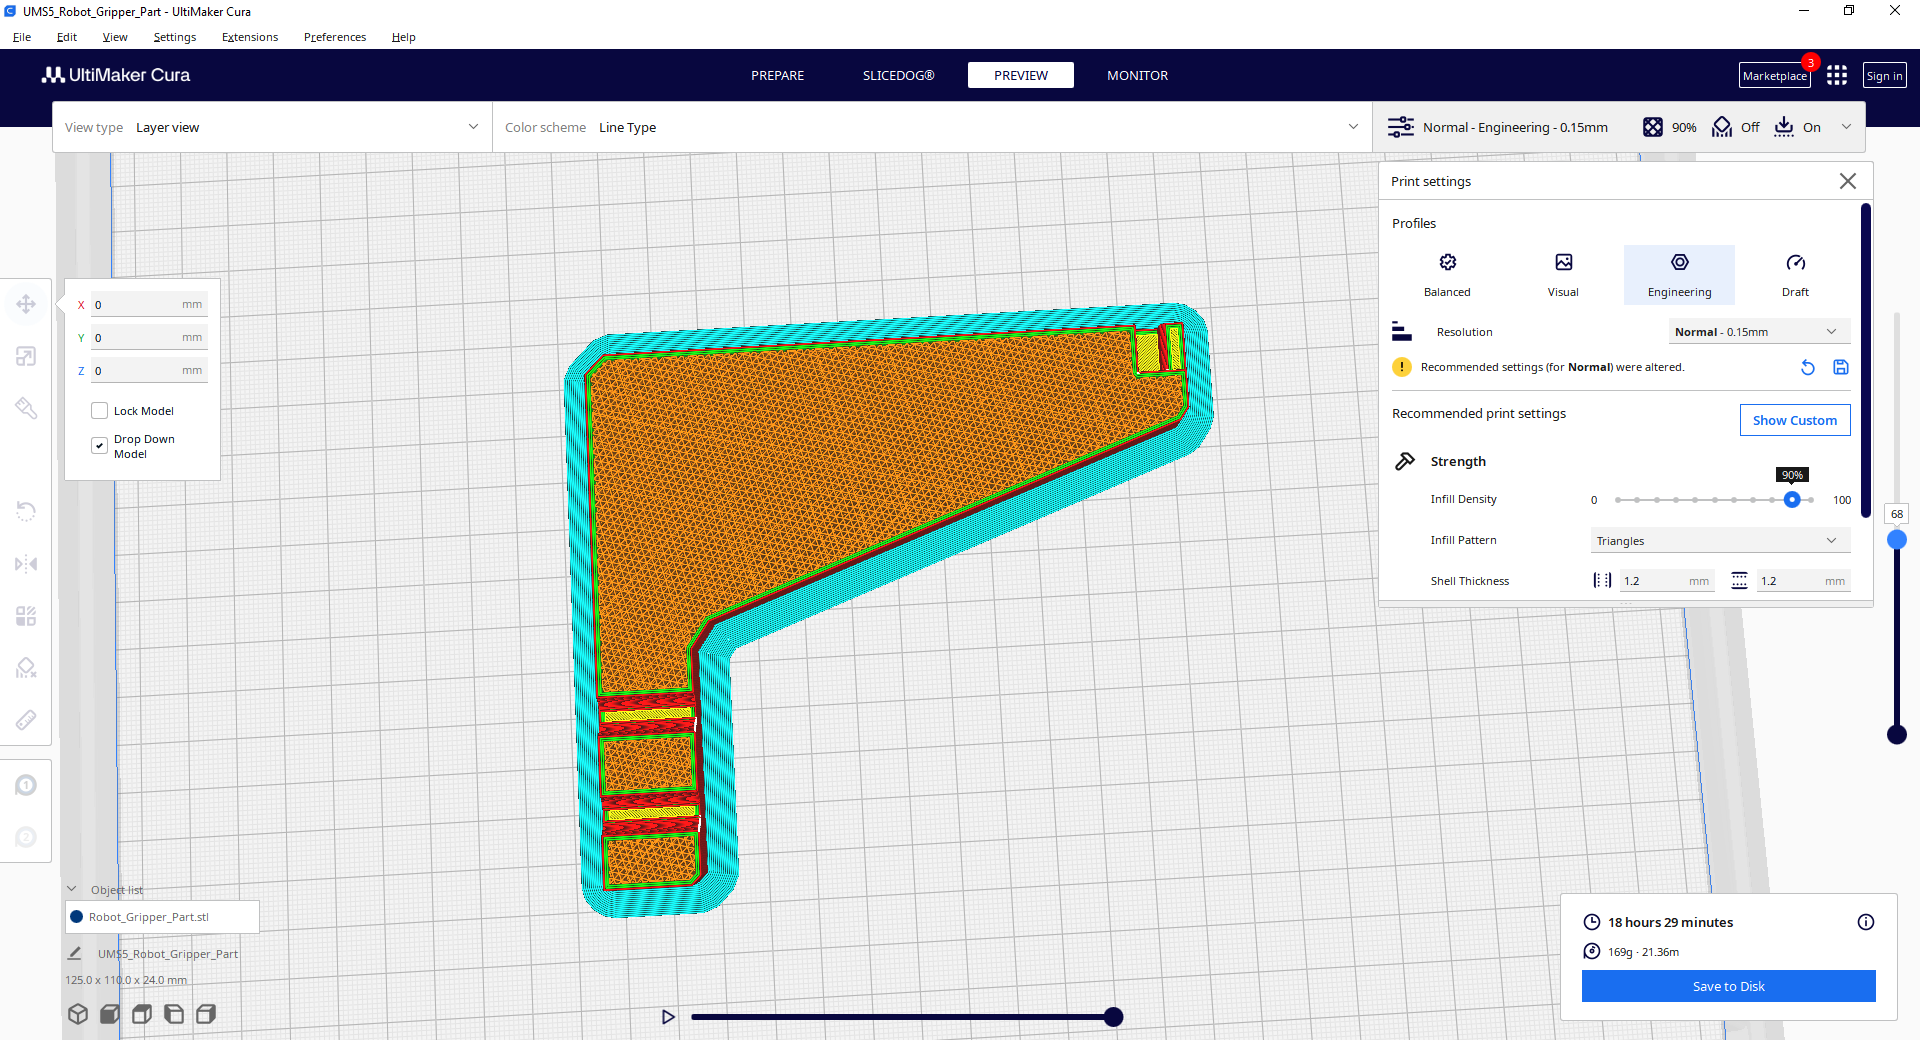
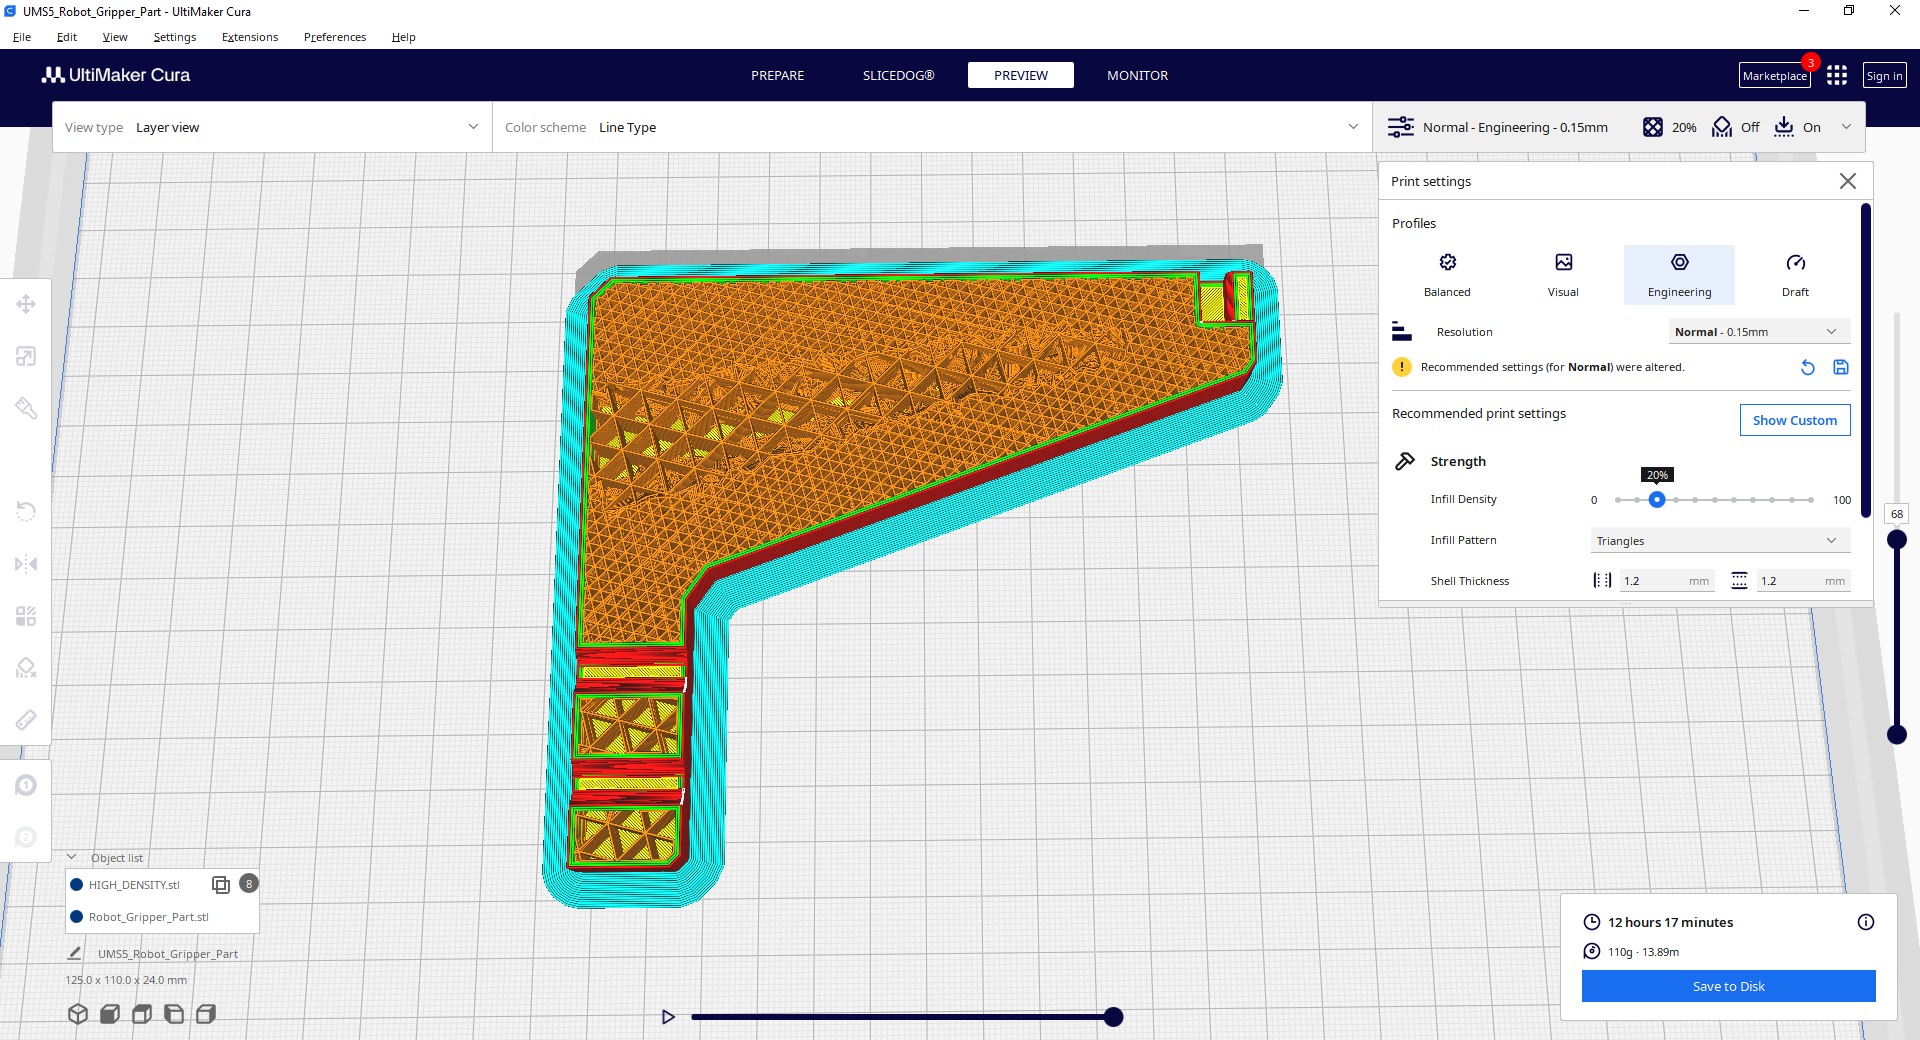
This quick sample shows you how Slicedog automatically optimizes a 3D model to reduce print time and material, while keeping strength. Just follow 4 simple steps
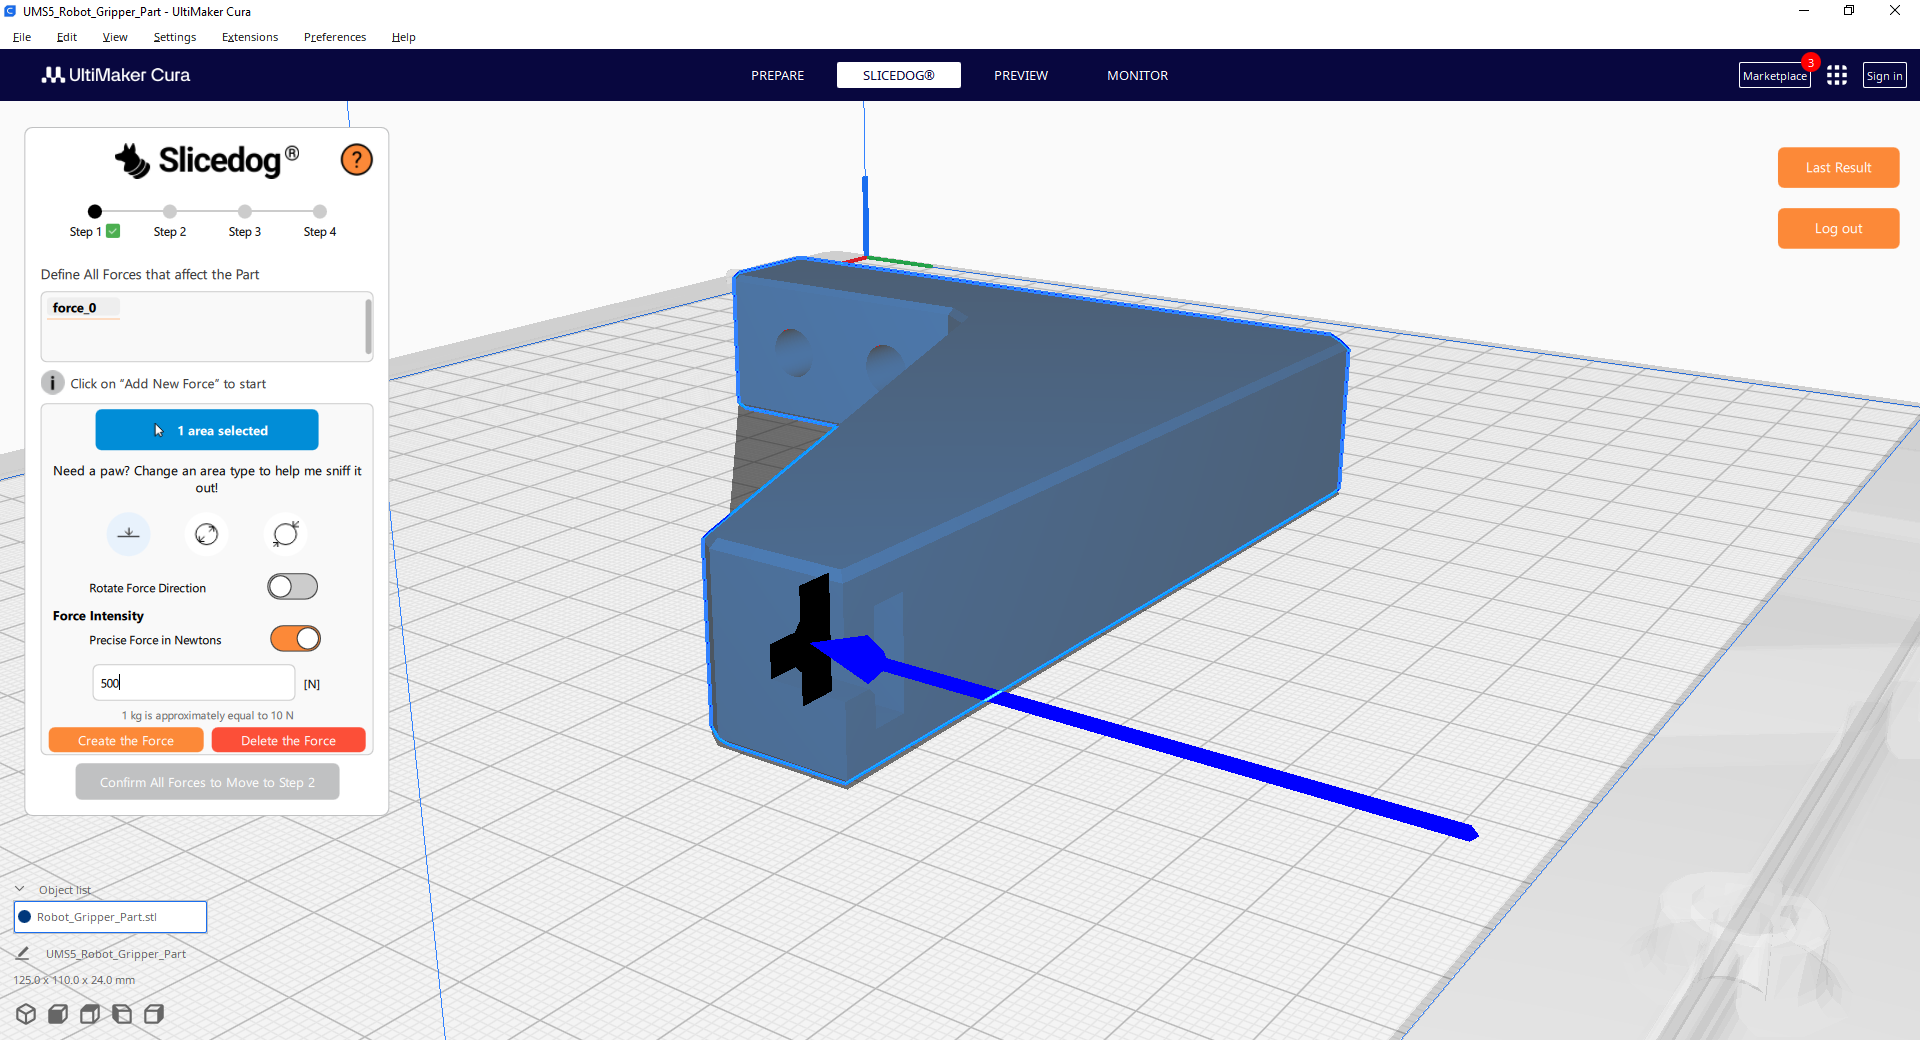
Step 1 - Forces
Click “Add Force” in the Slicedog panel. Then click the front T-shaped surface on the model and set the force to 500 N.
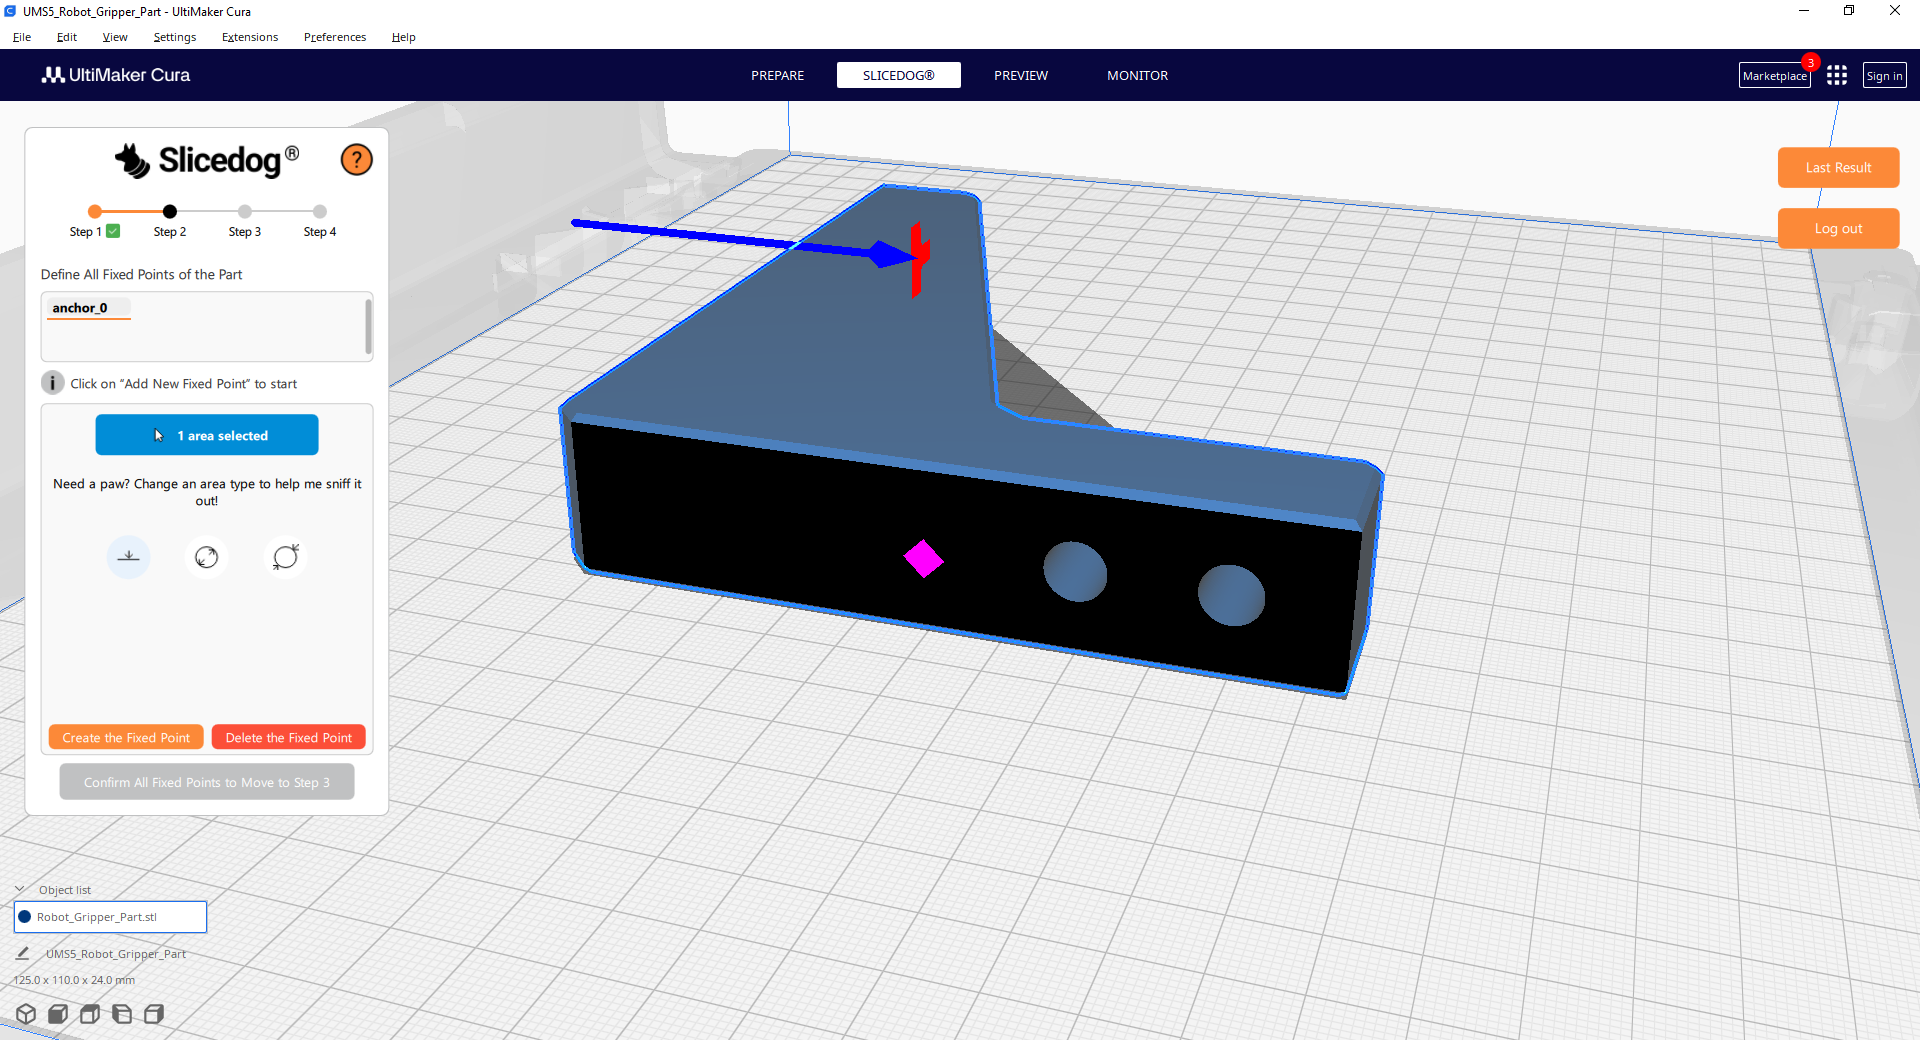
Step 2 - Fixed Points
Click “Add Fixed Point” in the Slicedog panel, then select the face to place the fixed point.
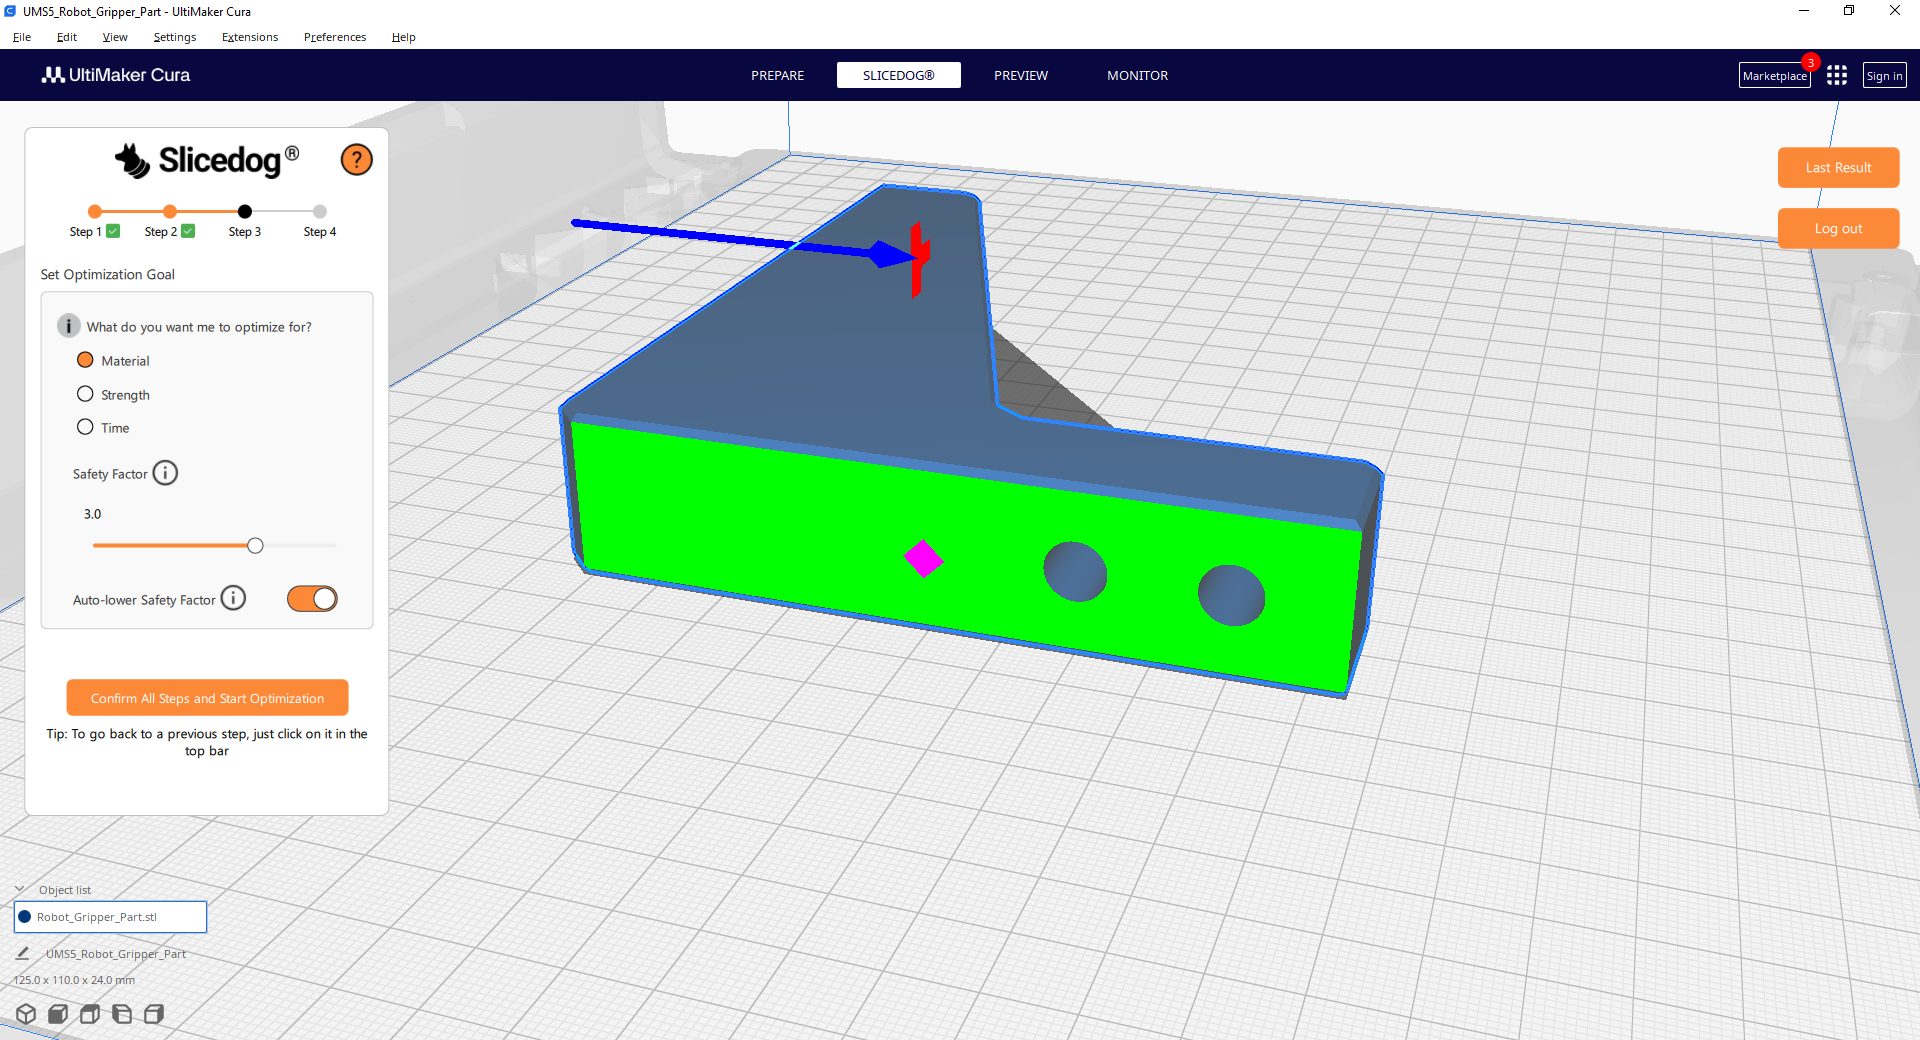
Step 3 - Optimization Goal
In this step, simply keep the default values. Then click “Confirm All Steps and Start Optimization.”
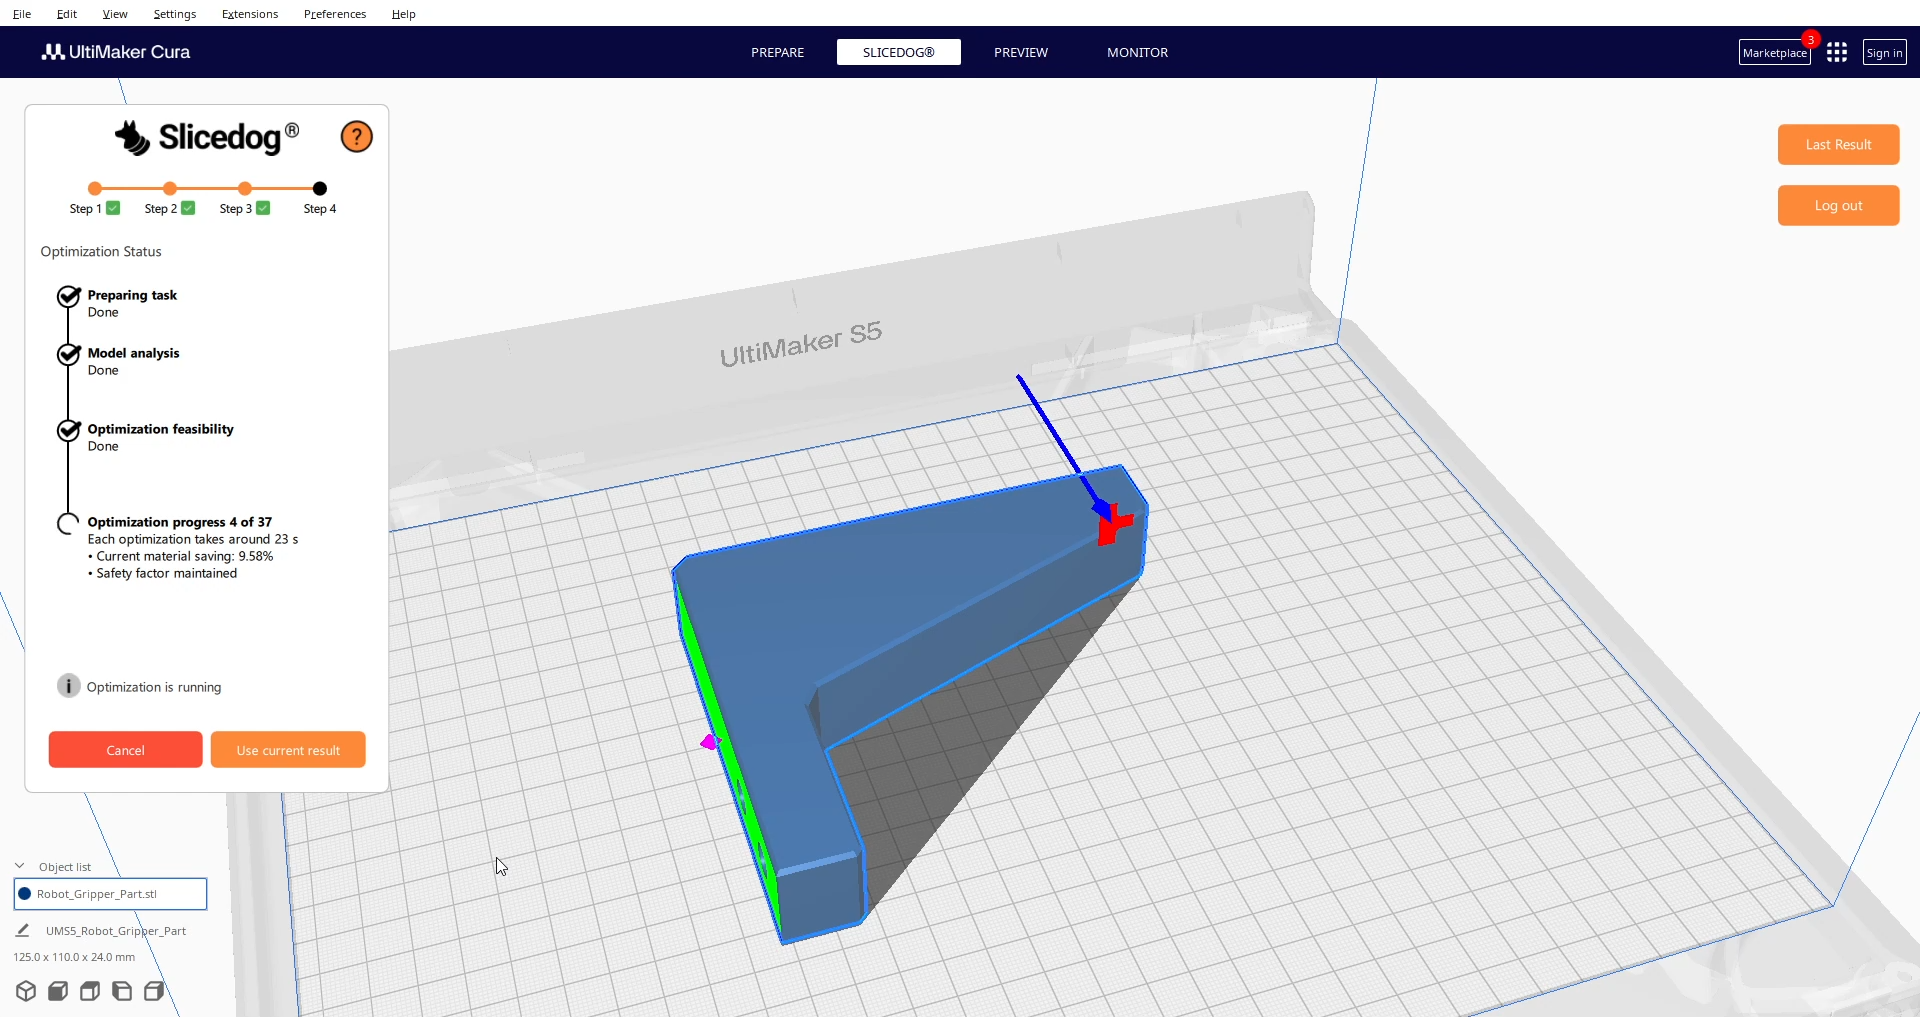
Step 4 - Optimization
At this stage, Slicedog connects to our servers and begins the optimization. This sample runs smoothly, and for most real-world models the process continues automatically so you can minimize the Cura window and continue your work.
If you prefer to monitor the workflow, look for these two checks:
Model Analysis – verifies that your model can be processed without issues. Takes about 10 seconds on sample model.
Optimization Feasibility – confirms that the part will remain strong under load when printed with the strongest settings. If no, Slicedog stops optimization. It wouldn’t make sense to optimize part that always breaks. Takes about 30 seconds on sample model
Optimization Progress – Slicedog begins reducing printing time and material. Each intermediate result is strength-validated, and if you let the optimization run to completion, you achieve the maximum savings.
During Optimization progress you can use “Use current result” button to stop optimizing and use current optimization result given the current optimization progress. Each result is fully valid and strength validated, the longer the optimization takes, the more printing time and material you save