Quick Start
In this example, we’ll explain how to use Slicedog® on a simple model based on a real-world use case.. If this page didn’t help resolve your issue, please contact support at: support@dolphinsimulation.com
Context of model
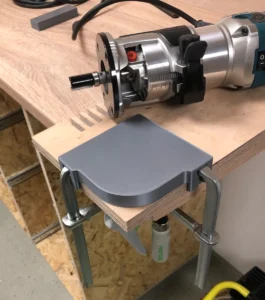
To optimize properly, it’s important to understand the context of the example model. The tool shown here is used for shaping rounded edges and includes slots for attaching bench vise arms. This version is designed for a 50 mm radius. The original file can be found at: Printables
Quick start
Follow the steps that you received in your instruction email to install the Slicedog® plugin in Ultimaker Cura. After successful installation, you will see the Slicedog® card in Ultimaker Cura. To open Slicedog®, you need to have one STL model inside your Ultimaker Cura
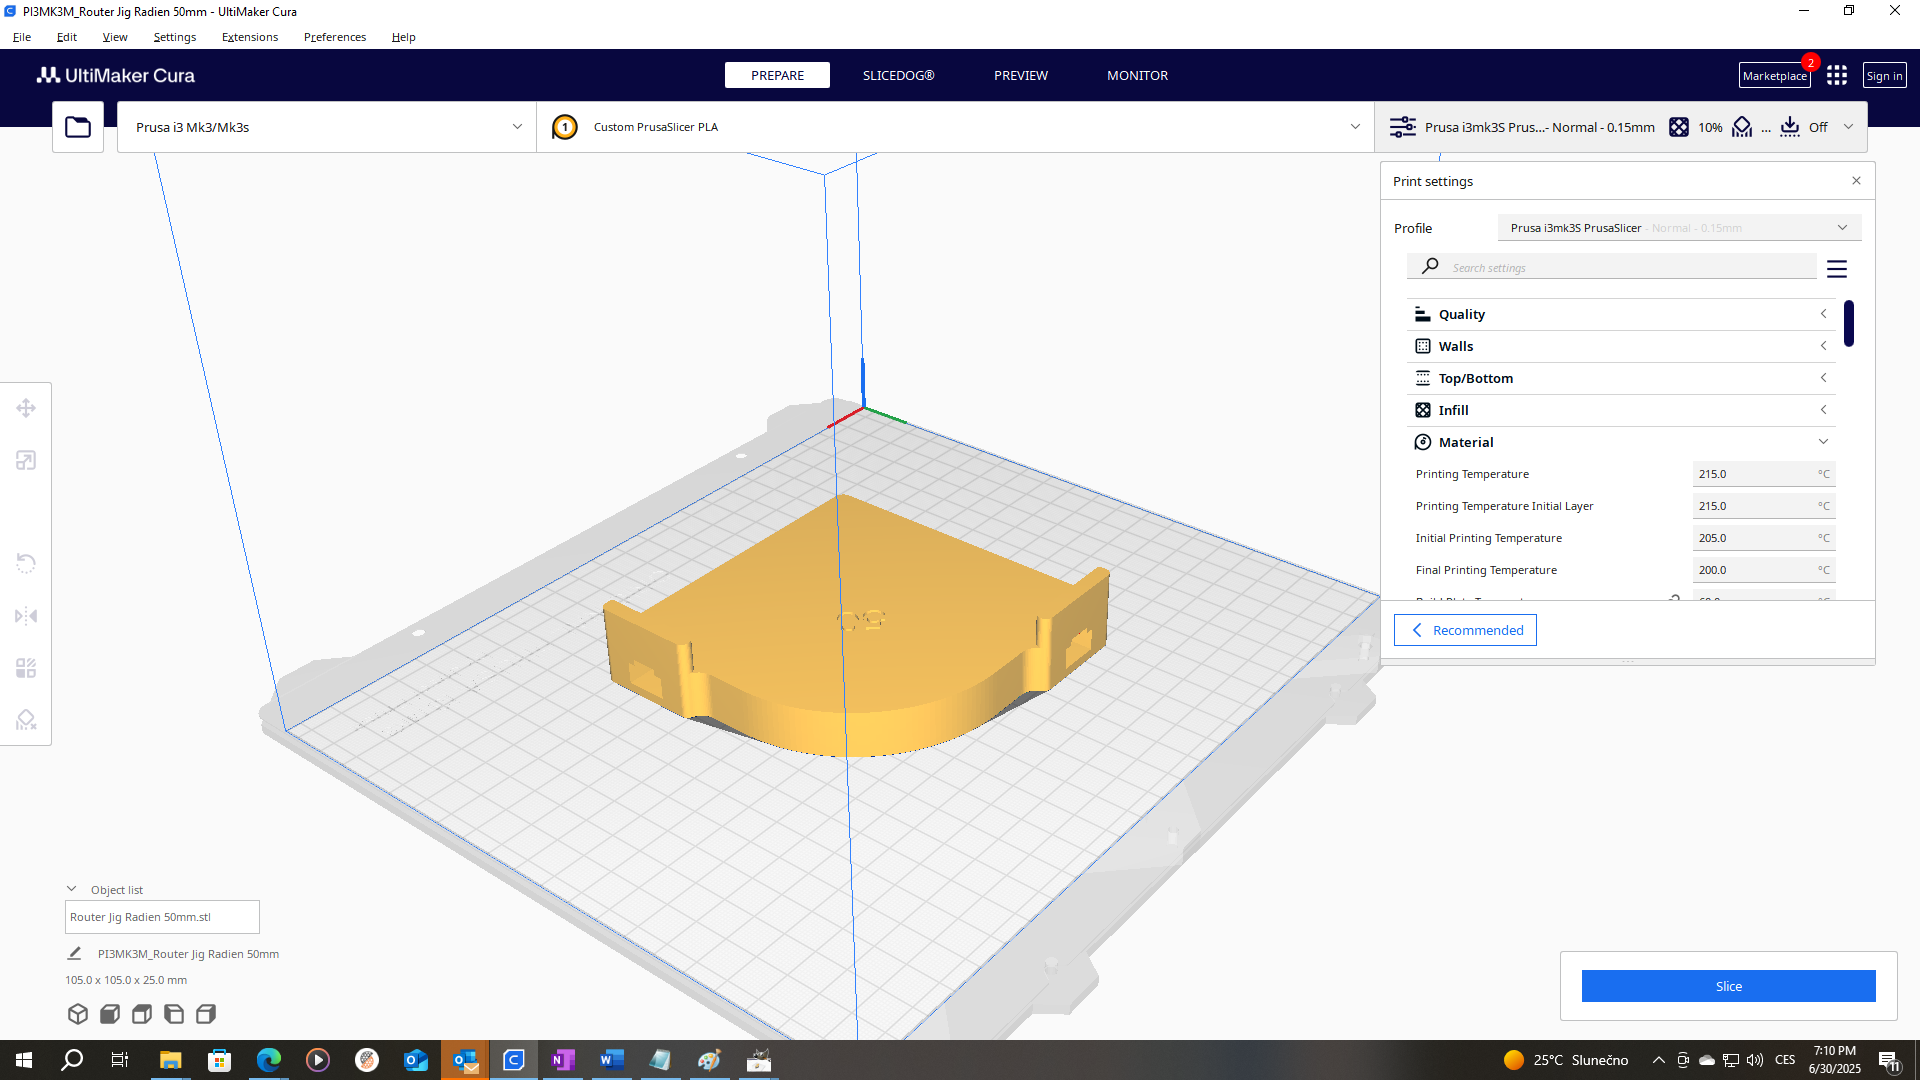
Default Ultimaker Cura screen - ready to use Slicedog®
After clicking on the Slicedog® card, you will notice the Slicedog® form on the left and login buttons on the right side. You can log in to your account now or start using Slicedog® and log in later
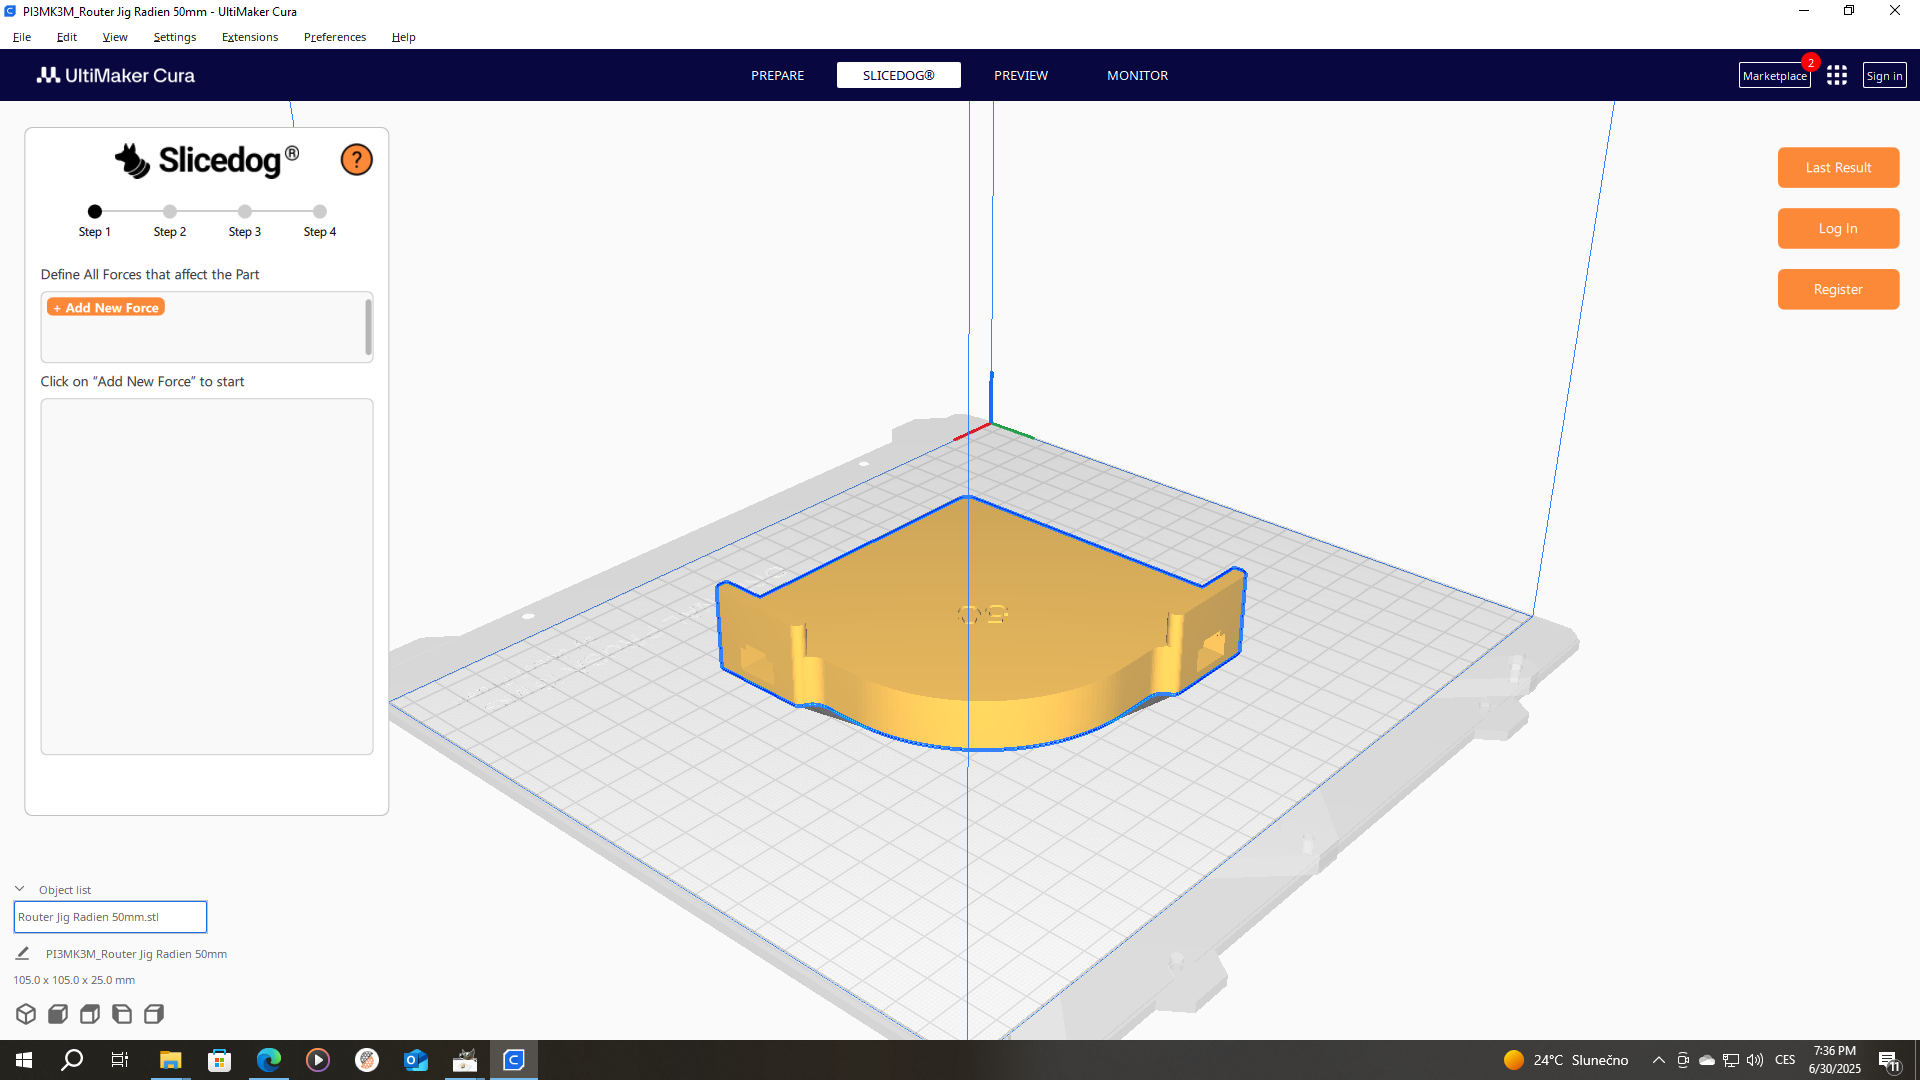
Slicedog® form as in Ultimaker Cura - initial step 1
To set up optimization, you must complete all steps shown in the top vertical bar of the Slicedog® form. Below, we describe each step
Step 1 - Forces
For Slicedog® to fetch as much material back as possible, it is required to set up the dominant forces that affect the part. In fact, a force is a “feature load” — a force that affects a selected part of the model.
In our example, you see a helping jig radius used to create a radius while working with wood. The fillet is part of the model that is affected by this force.
In Slicedog® you only define the dominant forces that influence part. Basically, you only need to create large forces — the printed part will have enough strength to avoid breaking under smaller forces.
By continuing to select parts of the print, you assign more areas to the same defined force
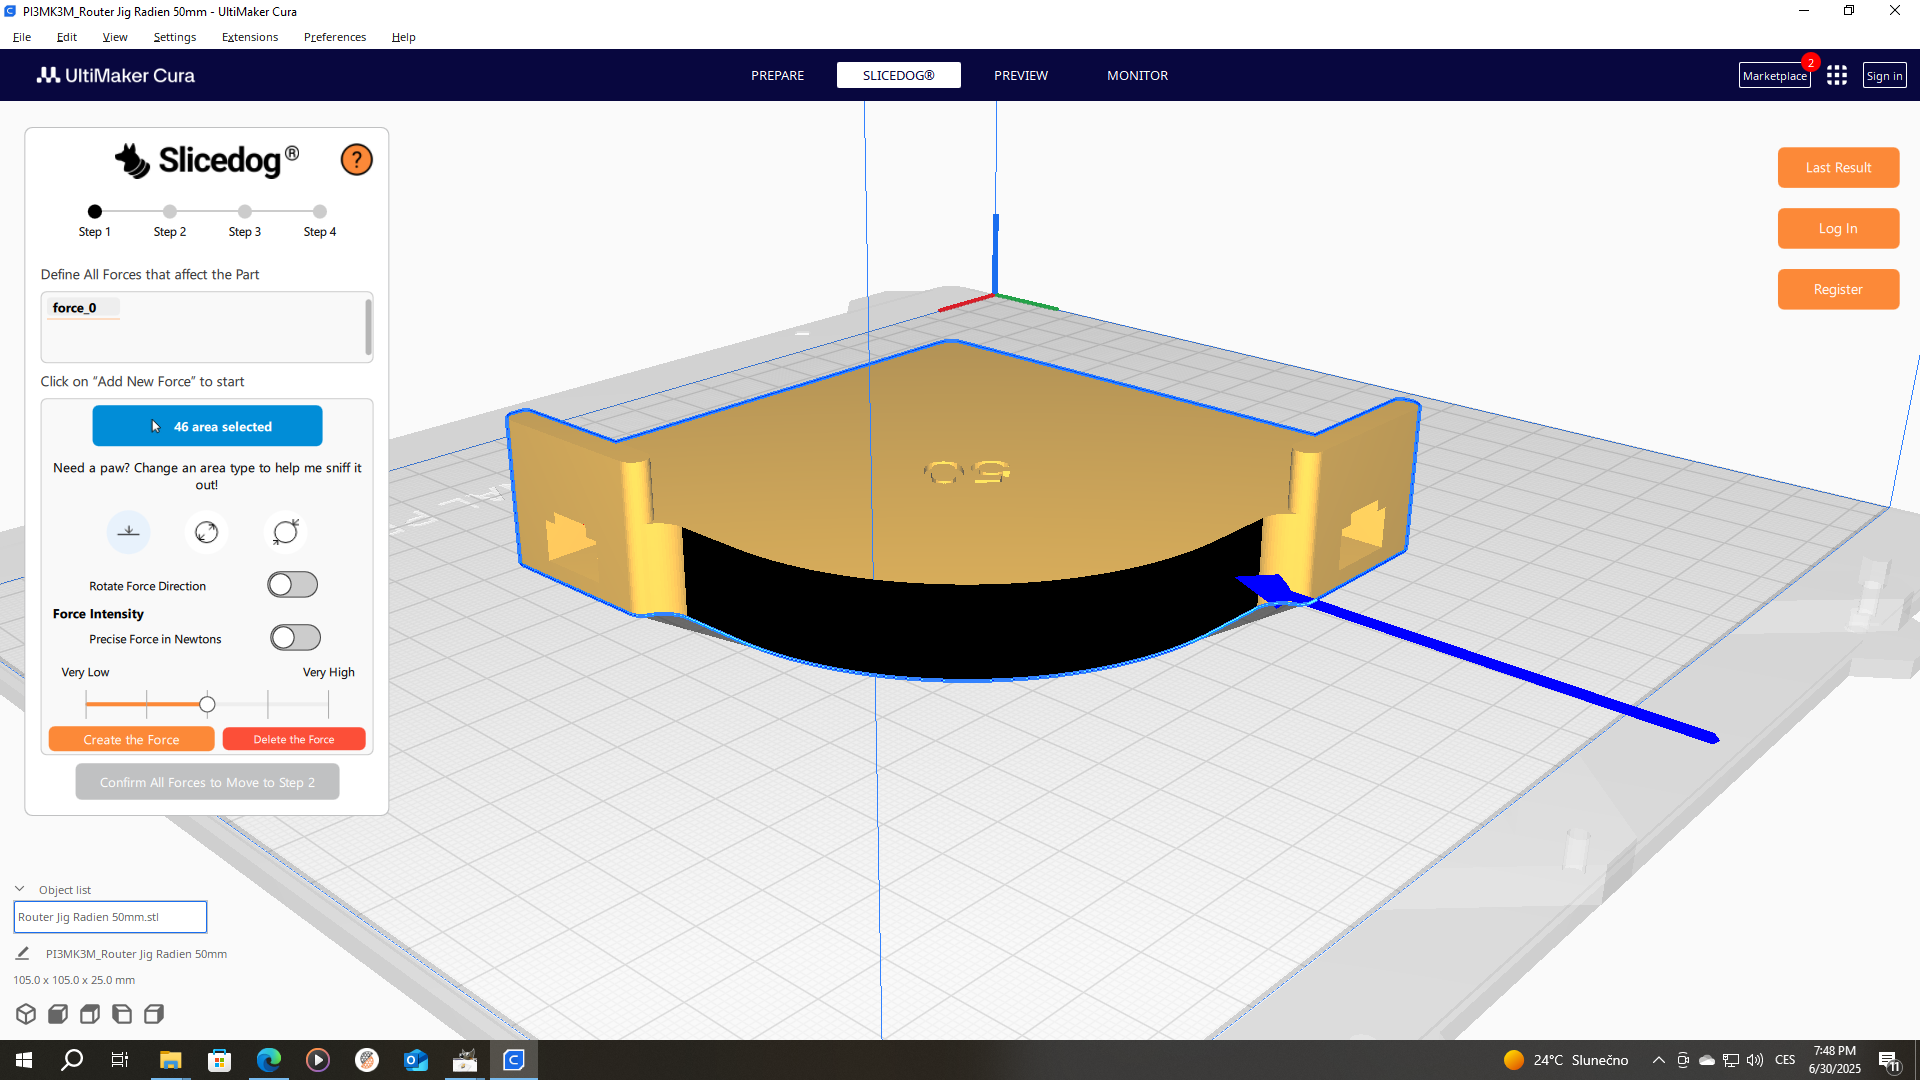
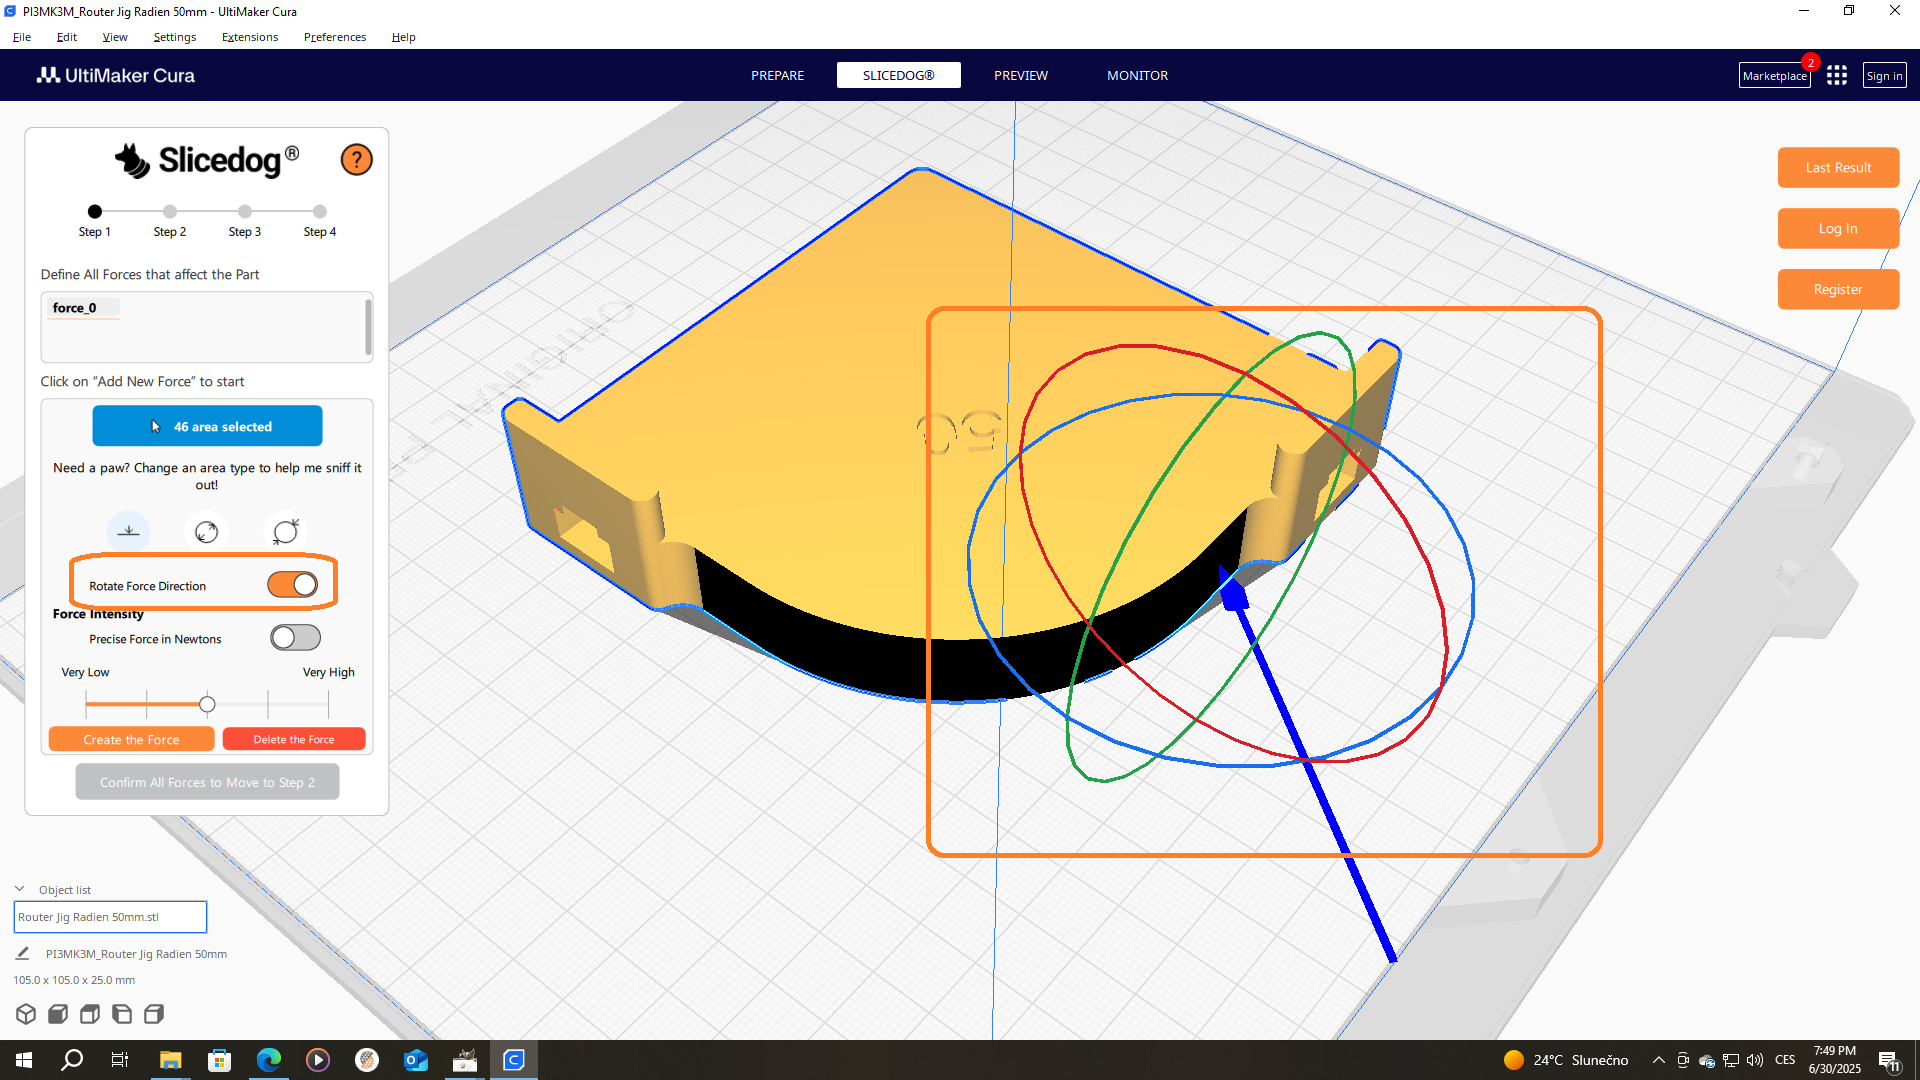
Force as areas selected on model with its size defined in Slicedog® Form
Sometimes, just as in this case, it is necessary to rotate the force. After clicking on the “Rotate Force Direction” in the form, Cura’s rotate tool appears. By selecting each axis, you rotate the part.
Since it is the force acting on the area, the location of the force has no effect on the result — so there is no option to move the force. However, rotating the force is required, as it affects how the force is applied to the affected area
Slicedog® form as in Ultimaker Cura
Step 2 - Fixed Points
That’s the part of your model that doesn’t move a millimeter — no matter what. It might be bolted to the ground, clamped in place, or just held really tight. Slicedog® needs to know which parts are staying put so it can figure out how your print handles the load.
In our case, the square fillets are the fixed points, since they’re locked in place by strong steel on the inside. We have two fixed points, as there are two square fillets in the part. After each fixed point is created, click “Confirm All Fixed Points to Move to Step 3”
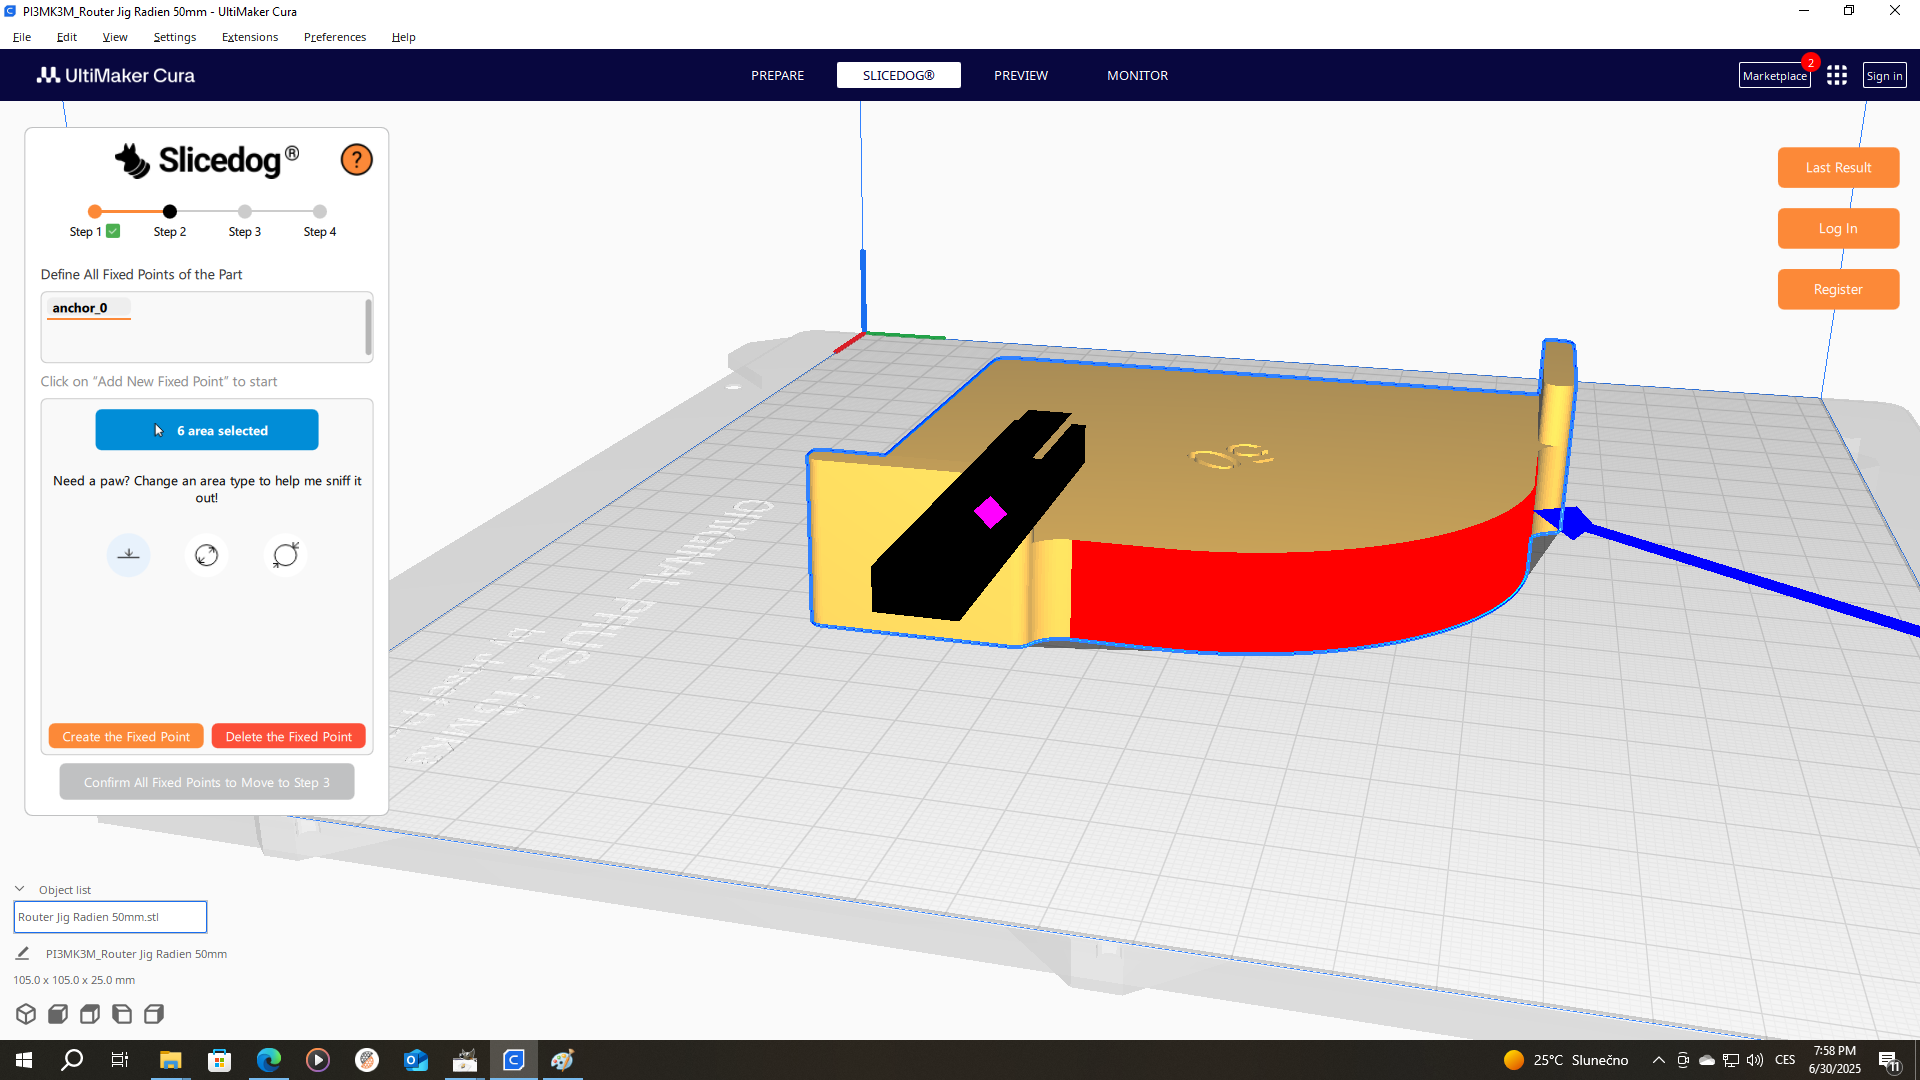
Defining first fixed point
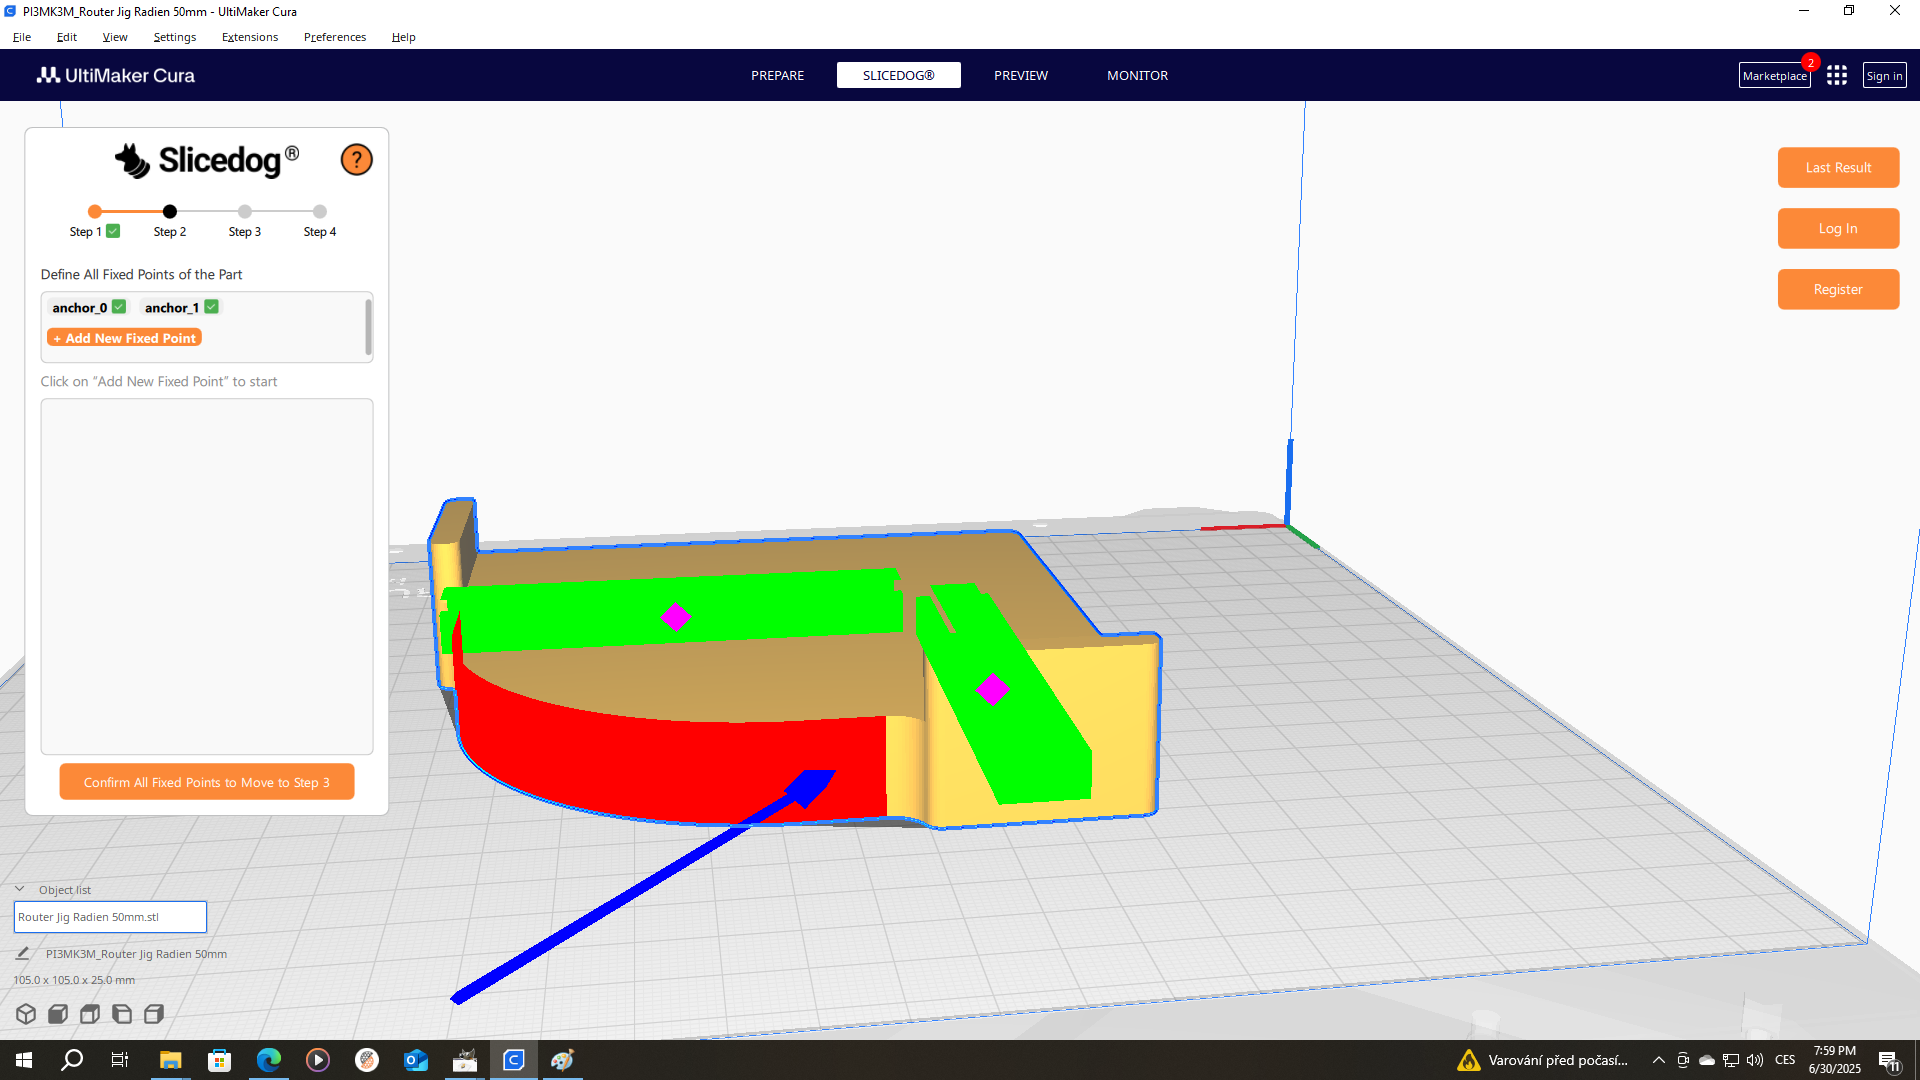
Created two fixed points, now it's time to move to step 3
Step 3 - Optimization
Choose what Slicedog® should focus on during optimization. Each option balances material savings with your chosen goal:
• Material Optimization – Saves as much material as possible while keeping the part strong where it matters.
• Strength Optimization – Reinforces the part, ideal when you need extra safety or durability.
• Time Optimization – Reduces print time as much as possible while keeping the part strong.
Step 4 - Results
In this step, messages appear about the optimization status. Standard optimization takes about 5 minutes; large models can take up to 30 minutes. While the optimization is running, you will see status messages in the Slicedog® window.
The optimization itself is done on our servers and follows these steps:
Prepare the model for optimization
Check if the part is strong enough with the most conservative settings
Run optimization rounds
If Slicedog® is unable to prepare the model for optimization, the model in its current STL form is not suitable for optimization. You can simplify the geometry following these guidelines or contact support for help.
If the part is not strong enough for the given forces and fixed points, even with the most conservative settings, Slicedog® stops the optimization and gives you advice on how to modify your part so it can withstand the applied load.
If all these checks are passed and optimization rounds begin, the process continues until the maximum possible material is saved—based on the selected Safety Factor and the defined Forces and Fixed Points. You can interrupt the process by clicking on one of the three buttons in the form — under the “i” icon, you’ll find explanations of what each button does. Alternatively, you can open a new Cura window and continue working, as no further user interaction is required in Slicedog® during optimization.
It’s recommended to wait until the optimization is complete, but you can also close Cura — your result will still be available. When you reopen Cura, go to Slicedog® log in to your account, and click on “Last Result” to retrieve it.